Installation
Forte-ion Installation Guide 🚀
This guide will walk you through the steps to install the Forte-ion application using both offline and online methods.
1. Forte-ion Offline Application Installation
This method is for installing the application using a local installer file without an internet connection.
Installation Steps
-
Run the Installer
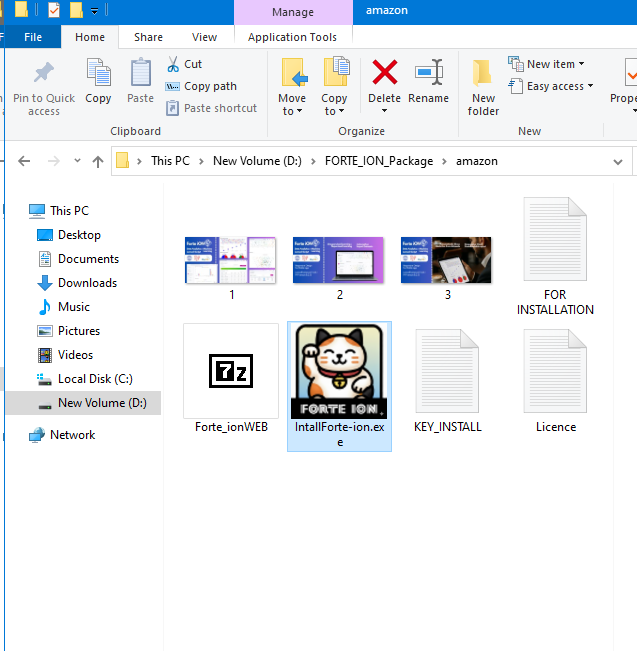
Locate the installation file named InstallForte-ion.exe in the downloaded package and double-click it to start the setup.
-
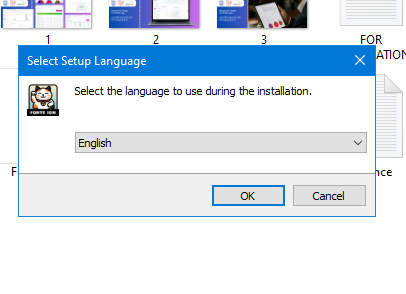
Select Language
Choose your preferred language for the installation from the dropdown menu and click OK.
-
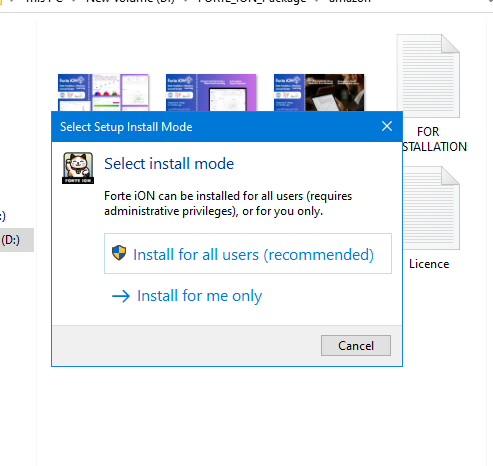
Choose Installation Mode
It is recommended to select Install for all users to ensure the application has the necessary administrative privileges. Click Next.
-
Accept License Agreement
Read the license agreement and choose I accept the agreement. Click Next.

-
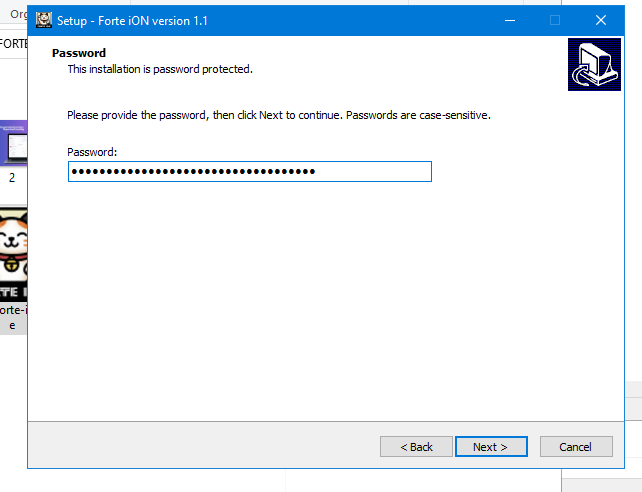
Enter Password
Enter the password provided for the installation. Note that the password is case-sensitive. Click Next.
-
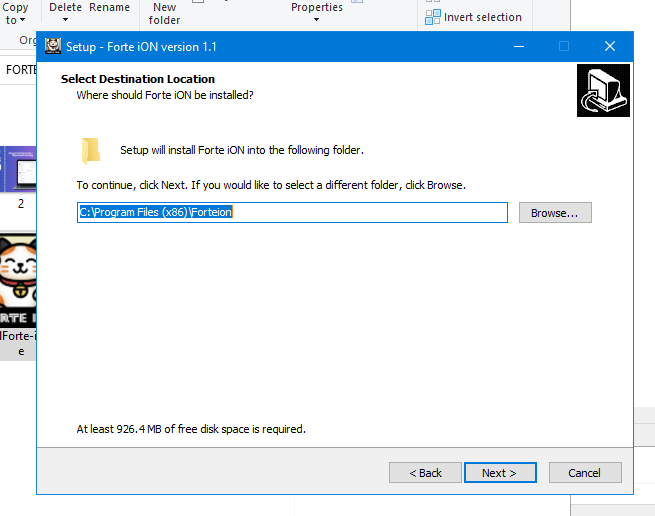
Select Destination Location
Choose where you want Forte iON to be installed. The default location is usually sufficient. Click Next.
-
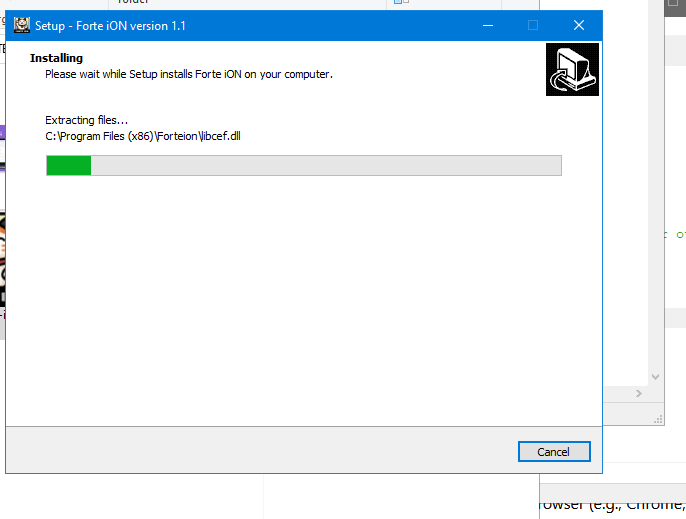
Wait for Installation to Complete
The setup will now install Forte iON on your computer. This may take a few moments.
-
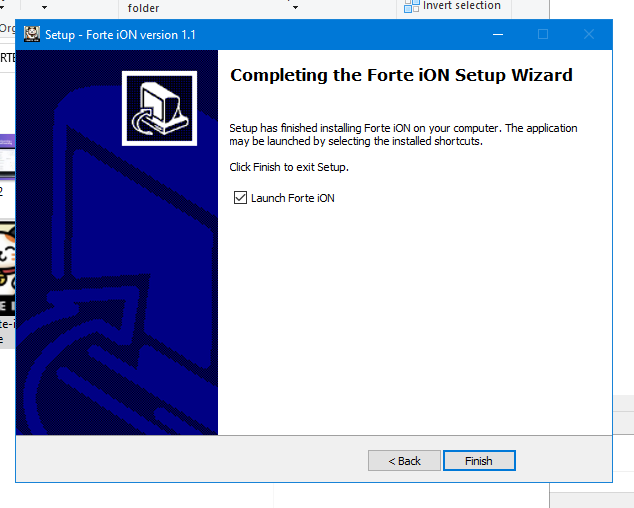
Finish Setup
Once the installation is complete, you will see a final wizard screen. You can choose to Launch Forte iON immediately. Click Finish to close the installer.
You have now successfully installed the Forte-ion application offline.
2. Forte-ion Online Application Installation
Once the development tools are ready, you can start installing the application.
A. Source Code Preparation
|
|
- Extract the Source Code:
- Extract the forte_ion.zip file to an easily accessible location on your computer, for example in D:\forte_ion.
- Navigate to the Project Directory:
- In CMD, switch to the drive where you extracted the folder: type D: and Enter (if you extracted it in drive D:).
- Move to the project folder: type cd forte_ion and Enter.
- Run the Laravel Local Server:
- Type the command: php artisan serve and press Enter.
- Wait until the message appears: INFO Server running on http://127.0.0.1:8000
B. Database Configuration Via Browser
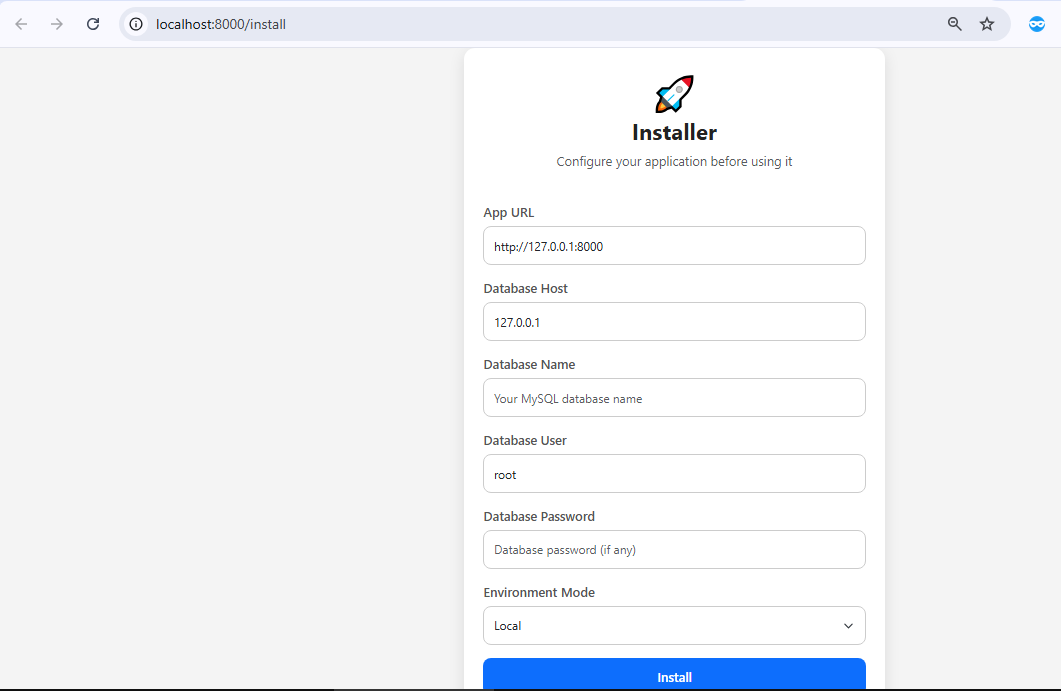
- Access the Installation Page:
- Open your browser and type the address: http://127.0.0.1:8000/install.
- Fill out the Installation Form:
- You will see the "Installer" view (as shown in image install1.png).
- Fill in your database details:
- App URL: Leave as default or use http://127.0.0.1:8000.
- Database Host: 127.0.0.1
- Database Name: Create your new database name here (e.g., forte).
- Database User: root (XAMPP default user).
- Database Password: Leave empty (XAMPP default password is usually empty).
- Click the Install button.
C. Finalizing Installation
- Make sure XAMPP or AppServ is installed and running.
- Create a new database (example: forteion ).
-
Default database credentials:
- Username: root
- Password: root
-
When error occurs, please check your .env file and make sure the database configuration is correct (MariaDB / MySQL):
DB_CONNECTION=mysql
DB_HOST=127.0.0.1
DB_PORT=3306
DB_DATABASE=forteion
DB_USERNAME=root
DB_PASSWORD=root
If your local MySQL database has no password, leave DB_PASSWORD empty:DB_PASSWORD=
- Database Migration and Seeding:
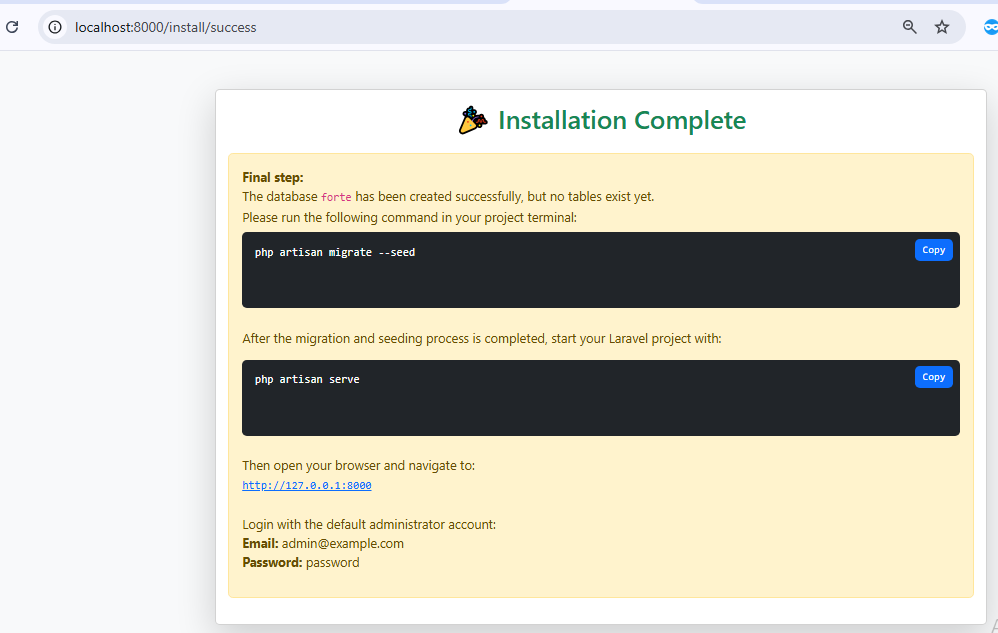
- After successful configuration, you will see the "Installation Complete" page (as shown in image install 3).
- The next step is to create the database tables and populate the initial data.
- In your Command Prompt (CMD) (which should still be in the forte_ion directory), run the command provided:
Bash
php artisan migrate --seed
- This command will create the necessary tables and populate the initial data (seeding).
- Starting the Application:
- Once the migration and seeding process is complete, run the command to start your Laravel application:
Bash
php artisan serve
- Log in to the Application:
- Open your browser and navigate to the address: http://127.0.0.1:8000
- You can login using the default administrator account:
- Email: admin@example.com
- Password: password
You have now successfully installed and run Forte-ion. Congratulations! 🎉